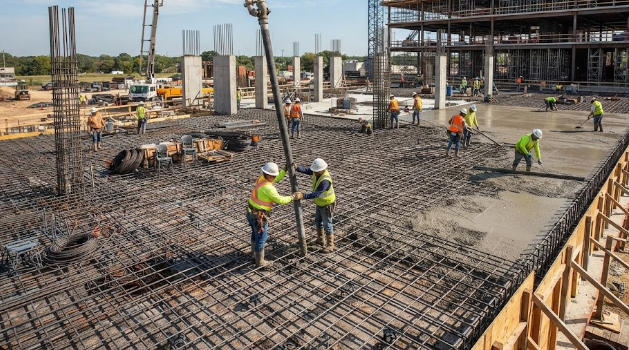
When you design concrete floor systems, understanding main reinforcement vs distribution reinforcement is crucial for structural integrity. Concrete handles compression well, but it cracks easily under tension. Therefore, structural engineers place steel bars inside the concrete to carry these tensile loads. However, not all steel bars perform the same function. You must use different types of reinforcement to handle various stresses safely.
Understanding Main Reinforcement vs Distribution Reinforcement in Slabs
The main reinforcement plays the most important structural role in any slab design. Specifically, these primary bars run parallel to the direction of the main bending moment. When loads push down on a slab, the bottom fibers stretch and experience heavy tensile stress.
Consequently, main reinforcement bars absorb these principal tensile stresses and prevent the concrete from cracking or failing. For example, in a simply supported one-way slab, you place the main bars running across the shorter span where bending moments reach their peak. You calculate the exact size and spacing of these bars based on maximum design bending moments.
The Role of Distribution Reinforcement
While main bars handle primary bending, secondary bars manage other critical forces. Distribution reinforcement runs perpendicular to the main reinforcement across the slab. This secondary steel grid serves several vital purposes in structural engineering.
First, it handles transverse stresses that develop across the slab. Second, it helps distribute concentrated or point loads evenly across a wider area. Third, distribution bars resist thermal movements and shrinkage cracking as the concrete cures and hardens over time. For instance, when hot weather causes concrete to shrink, these perpendicular bars hold the matrix together and minimize surface cracking.
Placement Rules and Structural Positioning
Proper placement of your steel bars directly impacts the load-bearing capacity of your slab. Therefore, you must follow strict positioning rules when laying out your structural grid. In a single-layer or multi-layer mesh, you place the main reinforcement outermost to maximize the effective depth of the slab.
The effective depth represents the distance from the extreme compression fiber to the centroid of the tension steel. Placing main bars closer to the outer tension face increases their leverage against bending moments. Meanwhile, you position the distribution reinforcement directly on top of or tied inside the main bars. This arrangement locks the entire steel skeleton in place before you pour fresh concrete.
Conclusion
Mastering the balance between primary and secondary steel bars ensures your concrete structures remain safe and durable. By understanding the distinct functions of each steel layer, you can design slabs that resist bending, control cracks, and handle heavy loads efficiently. To explore more construction tutorials and general engineering insights, you can visit Specs Finder.
References
- British Standards Institution. (1997). BS 8110-1: Structural use of concrete – Code of practice for design and construction. BSI London.
- American Concrete Institute. (2014). Building Code Requirements for Structural Concrete (ACI 318-14). ACI Farmington Hills.
- Mosley, W. H., Bungey, J. H., & Hulse, R. (2012). Reinforced Concrete Design to Eurocode 2. Palgrave Macmillan.