Decoding Gaming Laptop Battery Life: Why It Drains So Fast

Many users feel surprised when their expensive machines lose power within minutes. Managing gaming laptop battery life often feels like a constant battle against physics. Unlike slim office laptops built strictly for energy efficiency, gaming rigs pack massive amounts of hardware into tight spaces. Consequently, understanding how these components draw power helps you manage your expectations and protect your portable device.

The High-Wattage Hardware Driving Gaming Laptop Battery Life

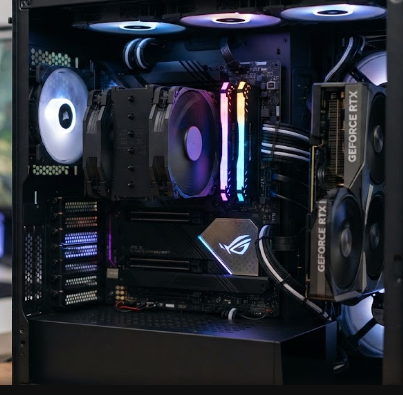
At the heart of the issue lies raw performance. Manufacturers cram high-voltage components into compact chassis. For instance, a dedicated graphics card demands immense electrical current to render complex 3D worlds smoothly.

Furthermore, heavy-duty cooling fans spin at high speeds to prevent overheating, which consumes additional energy. Add a bright, high-refresh-rate screen into the mix, and you get a massive power drain. Therefore, keeping these high-performance parts running requires far more energy than a standard battery can comfortably supply for long periods.

The Unplugged Trap: Why Gaming Laptop Battery Life Drops Suddenly

Many beginners attempt to play intensive video games while unplugged from a wall socket. Unfortunately, this scenario creates a severe bottleneck. Gaming on battery power drastically drains the cell in under an hour because the system cannot pull enough current from chemical storage alone.

To prevent sudden shutdowns and component damage, the computer automatically triggers heavy performance throttling. As a result, frame rates plummet, and your game stutters badly. Playing demanding games without a charger completely defeats the primary purpose of having a high-end mobile rig.

Practical Optimization Tips to Extend Gaming Laptop Battery Life

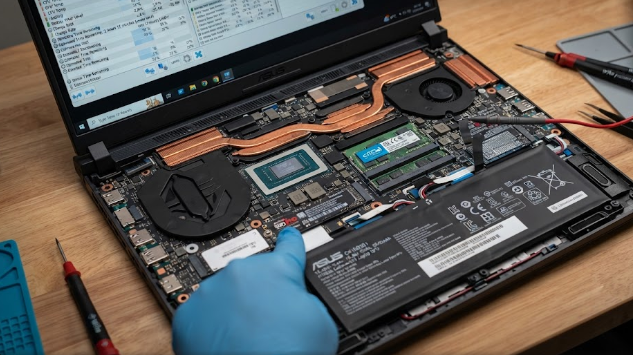
Fortunately, you can take active steps to preserve power when you are away from an outlet. First, switch your system from dedicated graphics to integrated graphics for light web browsing or document editing. Integrated chips consume a fraction of the power.

Additionally, lower your screen brightness and reduce the display refresh rate from high settings down to 60Hz. Finally, close background apps like Discord or gaming launchers that secretly keep your hardware awake. These simple adjustments dramatically improve your mobile runtime.

Mastering your device settings ensures you get the best of both worlds: extreme performance at your desk and reliable portability on the go. By understanding your hardware demands, you can easily avoid unexpected shutdowns during important tasks. For more in-depth hardware guides and battery optimization strategies, you can explore detailed reports on Tom’s Hardware.

References

  1. XMG Help Center. (2025). Short Battery Life in Gaming Laptops: Troubleshooting Guide.
  2. EveZone. (2026). Battery Life Leaders Among Gaming Laptops and Power Management.

 CPU vs GPU for Gaming: Where Should You Spend Your Budget?

CPU vs GPU for Gaming: Where Should You Spend Your Budget?

Building a custom computer requires careful financial planning, especially when evaluating CPU vs GPU for gaming performance. Many first-time builders feel confused about where to invest their hard-earned money. If you allocate your funds incorrectly, your system will experience performance bottlenecks. Therefore, understanding the distinct roles of each component helps you make smart purchasing decisions and protects your hardware budget.

The GPU’s Core Role in CPU vs GPU for Gaming

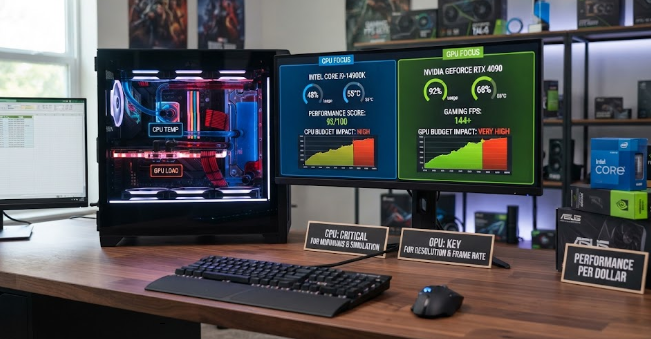
The graphics card acts as the single most important component for your gaming rig. When analyzing CPU vs GPU for gaming, you must remember that the graphics processor dictates your visual quality, resolution, and frame rates. For instance, if you want to play modern titles at crisp 1440p or stunning 4K resolutions, your graphics card handles nearly all the heavy rendering work. Without a robust graphics card, your favorite games will suffer from severe stuttering and low frame rates, regardless of how fast your other components operate.

The Common Beginner Mistake

Unfortunately, many beginners make costly errors during component selection. They often spend extra money on an ultra-powerful processor while skimping on the graphics card. This imbalance creates a severe hardware mismatch. Your expensive processor will sit idle because it finishes its tasks instantly and waits for the slower graphics card to catch up. Consequently, you waste valuable funds on processing power you cannot actually utilize during gameplay. Always prioritize visual hardware if your primary goal is high-end entertainment.

Finding the Smart Balance for CPU vs GPU for Gaming

Achieving optimal system performance requires a sensible approach. Hardware experts recommend pairing a solid mid-range processor with the strongest CPU vs GPU for gaming pairing your wallet can support. For example, combining a reliable six-core processor with a high-performance graphics card delivers incredible value. This balanced strategy prevents bottlenecks and ensures your computer runs smoothly for years.

Ultimately, balancing your hardware investment guarantees you enjoy stutter-free gaming without overspending. By targeting the right components, you maximize your financial value. For additional hardware benchmarks and comprehensive component analysis, you can read the latest guides on Tom’s Hardware.

References

  1. Tom’s Hardware. (2026). GPU Hierarchy and Gaming Performance Benchmarks.
  2. Corsair. (2026). CPU vs GPU: Which is More Important for Gaming? Retrieved from hardware expert resources.

CXL 3.1: The Specs Unifying Server Motherboard Memory

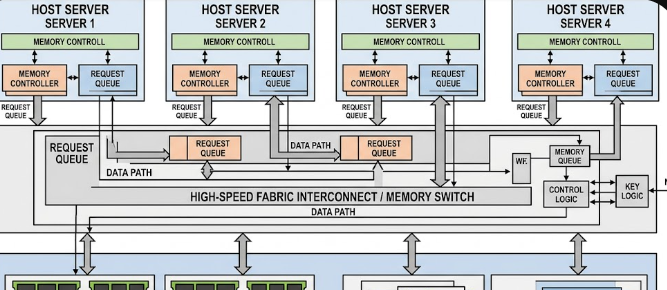
: A schematic diagram showcasing multiple host servers connected to a shared pool of external memory resources

Modern data centers face a massive challenge when handling workloads like artificial intelligence and big data analytics. Standard servers often run out of memory quickly, which forces operators to buy more physical hardware than they actually need. To solve this problem, engineers developed CXL 3.1: The Specs Unifying Server Motherboard Memory. This breakthrough standard changes how we think about resource allocation by breaking down physical barriers between individual servers.

What is CXL 3.1 and How Does It Work?

Compute Express Link (CXL) is an open industry standard that creates a high-speed connection between processors and external devices. Specifically, the CXL 3.1 version runs directly over the physical layer of PCI Express (PCIe) Gen 6. Consequently, it achieves double the bandwidth of previous generations while using the exact same physical slots on a motherboard.

By using this advanced connection, processors (CPUs), graphics cards (GPUs), and specialized smart accelerators can share a single, unified pool of memory. The system maintains “coherency” across the board. This means that if a GPU changes a piece of data in the shared pool, the CPU sees that exact change instantly. As a result, different chips can work on the same task together without waiting for slow data transfers.

Understanding the CXL 3.1 Architecture

The standard works by combining three distinct protocols over a single physical link:

  • CXL.io: This protocol handles device discovery, configuration, and register access. It works exactly like standard PCIe.
  • CXL.cache: This protocol allows peripheral devices, such as GPUs, to efficiently access and cache the host system’s memory.
  • CXL.mem: This protocol lets the host CPU access memory attached to an external CXL device as if it were a standard local motherboard DIMM.

By combining these protocols, CXL 3.1 makes external, chassis-mounted memory modules look and feel like local RAM to the server operating system.

Fabric Management and Multi-Head Devices

In a traditional setup, you cannot share a single stick of RAM between two separate motherboards. However, the new fabric management specifications in CXL 3.1 change this reality entirely. The system uses “Multi-Head” devices that can plug into multiple host server nodes at the exact same time.

Because of this multi-head capability, a central fabric manager can assign specific blocks of RAM to different servers on-the-fly. For example, if Server A suddenly experiences a massive traffic spike, the manager instantly routes extra gigabytes of RAM to it. This entire process happens electronically in real-time. Therefore, you do not need to shut down the server, open the chassis, or reboot the operating system to upgrade memory.

Direct Memory Access Latency Floors

Many administrators worry that moving memory outside of the motherboard will slow down performance. Fortunately, CXL 3.1 solves this concern by keeping transport latency extremely low. Because the protocol bypasses traditional complex network layers, it keeps extra latency down to single-digit nanoseconds.

To put this in perspective, look at the comparison table below:

Memory Connection TypeRelative Latency OverheadPerformance Class
On-Board DDR5 DIMMBaseline (0 ns)Native / Fastest
CXL 3.1 External Pool+10 to +15 nsNear-Native
Standard RDMA Network+1,000 to +5,000 nsDelayed / Slow

This tiny latency penalty means that fabric-attached memory banks perform almost identically to traditional on-board RAM. Consequently, applications run smoothly without bottlenecking.

Real-World Data Center Efficiency

From a business perspective, memory pooling solves one of the biggest money-wasting issues in IT: “stranded memory.” In typical data centers, one server might use 90% of its CPU but only 10% of its RAM. That leftover RAM sits idle and cannot be used by any other machine.

By utilizing CXL 3.1, companies can pool all their memory together in a central chassis. When a server needs memory, it borrows it from the shared pool. Once the task is complete, the server returns the memory back to the pool. This dynamic sharing slashes total operational hardware costs because companies no longer need to over-provision their physical servers.

For a deeper dive into the technical details and upcoming hardware releases of this standard, you can explore the official technical documentation on the CXL Consortium Website.

References

  • Compute Express Link (CXL) Consortium. (2023). CXL 3.1 Specification.
  • PCI-SIG. (2022). PCI Express Base Specification Revision 6.0.
  • Rambus Technical Blog. (2024). Understanding CXL Memory Pooling and Latency.

Why High-Z Over-Ear Headphone Impedance Dictates Your Source

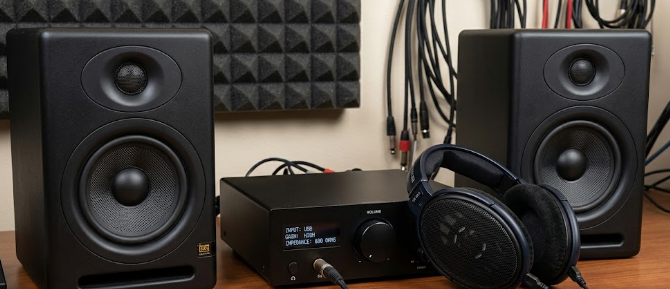
 A pair of studio monitors demonstrating high-Z over-ear headphone impedance next to a dedicated desktop amplifier.

When you dive deep into the world of high-fidelity audio, you quickly run into a wall of technical specifications. Among these numbers, High-Z over-ear headphone impedance stands out as one of the most critical factors. Many music lovers purchase premium headphones only to find that they sound quiet or hollow when plugged directly into a phone.

To prevent this disappointment, you must understand how electrical resistance impacts your audio gear. This guide will break down the science of impedance and explain how it shapes your listening experience.

Defining the Impedance Metric

In basic terms, impedance measures how much a circuit resists an alternating current (AC) electrical signal. We measure this resistance in Ohms ($\Omega$). In the audio world, headphones span a massive spectrum.

Low-impedance models usually range from 16 to 32 Ohms. Manufacturers design these lower values specifically for mobile devices, laptops, and wireless earbuds. Consequently, these devices can easily drive low-resistance gear using very little battery power.

On the other hand, studio legends and audiophile gear feature high impedance, which we often call “High-Z”. These headphones range from 250 Ohms up to a massive 600 Ohms. Because they resist electrical current so strongly, consumer devices simply cannot supply enough power to make them perform well. Therefore, you need specialized source gear to unlock their true sonic potential.

The Physics of Voice Coil Wire Architecture

To understand why manufacturers build high-impedance headphones, we must look inside the driver. The heart of a dynamic headphone is the voice coil. This coil consists of wrapped wire that reacts to magnetic fields to move the headphone speaker cone.

[Audio Source] —> [Thinner Voice Coil Wire (More Windings)] —> [Stronger Magnetic Field] —> [Precise Cone Movement]

To achieve high impedance, engineers wrap the voice coil with thousands of turns of ultra-fine copper wire. Because this wire is incredibly thin, it naturally creates higher electrical resistance. However, this thin wire also has a massive advantage because it is extremely lightweight.

This reduced weight minimizes the moving mass of the speaker driver. Consequently, the driver can react to audio signals with lightning-fast speed. Audiophiles call this a fast “transient response.” Ultimately, this physical design results in incredibly clear sound and lower acoustic distortion.

The Sensitivity Floor: Ohms Are Only Half the Story

While understanding High-Z over-ear headphone impedance is vital, you cannot ignore sensitivity. Sensitivity measures how efficiently a headphone converts an electrical signal into actual acoustic volume. Manufacturers usually state this in decibels per milliwatt ($\text{dB/mW}$) or decibels per Volt ($\text{dB/V}$).

If a headphone has high impedance and a low sensitivity floor, it behaves like a heavy door with a stiff hinge. To swing it open, you need a high-voltage push. This physical reality mathematically demands a high voltage swing from your audio source.

$$\text{Power (Watts)} = \frac{\text{Voltage}^2}{\text{Impedance}}$$

As the formula shows, when impedance rises, you need much more voltage to maintain the same power output. Standard smartphones output less than 1 Volt. Because of this limitation, a dedicated desktop amplifier is absolutely necessary to reach comfortable, dynamic listening volumes without distorting the music.

Damping Factor and Output Impedance Matching

When pairing your headphones with a source, you must follow the audio industry’s “1/8th rule.” This guideline ensures that your source’s output impedance is at least eight times lower than your headphone’s nominal impedance.

For example, if your headphones are 250 Ohms, your amplifier’s output impedance should ideally be lower than 31 Ohms. Keeping this ratio correct ensures a high damping factor. This electrical relationship allows the amplifier to tightly control the physical movement of the headphone driver.

If you violate this rule, the amplifier will struggle to stop the speaker cone’s movement efficiently. As a result, you will experience a muddy, boomy bass response and a distorted frequency curve. Properly matching your gear ensures that you get the tightest bass and cleanest highs possible.

References

  • To learn more about the technical math behind headphone power and voltage requirements, check out the detailed calculator guides on Headphonesty.
  • Baxandall, P. J. (2001). Audio Power Amplifier Design Handbook. Newnes.
  • Toole, F. E. (2018). Sound Reproduction: The Acoustics and Psychoacoustics of Loudspeakers and Rooms. Routledge.

Carbon Nanotube Thermal Pads: Eliminating CPU Paste

 A close-up view of carbon nanotube thermal pads applied to a desktop CPU processor.

If you build PCs, you know that managing heat is vital. Traditionally, builders rely on liquid thermal paste to bridge the gap between a CPU and its cooler. However, this liquid paste often dries out over time. It also suffers from the pump-out effect, where continuous heating and cooling cycles push the paste out of place. Consequently, you must reapply it regularly to keep temperatures low. Today, carbon nanotube thermal pads offer a permanent, solid-state solution. These solid-state Thermal Interface Materials (TIMs) eliminate paste degradation entirely. For instance, recent material science innovations, such as Noctua’s NT-CP1 launched at Computex 2026, show us the future of cooling. Therefore, hardware modders and extreme overclockers are now switching to carbon nanotube thermal pads for maintenance-free reliability.

How Carbon Nanotube Thermal Pads Excel in Vertical Heat Transfer

To understand why these pads work so well, we must look at their physical specification. Specifically, we measure thermal conductivity in W/mK (Watts per meter-Kelvin). Standard thermal pastes usually hover around 4 to 12 W/mK. In contrast, vertically aligned carbon nanotube arrays deliver incredible bulk thermal transfer capabilities. Because the manufacturers align the nanotubes vertically, they move heat straight up from the processor directly to the cooler. Furthermore, this vertical alignment allows carbon nanotube thermal pads to rival the heat transfer rates of pure liquid metals. As a result, you get top-tier cooling performance without the mess of standard paste.

Micro-Conformability in Carbon Nanotube Thermal Pads

You might wonder how a solid pad fills microscopic air gaps. After all, standard liquid pastes spread easily into every tiny scratch on a CPU integrated heat spreader (IHS). Thankfully, engineers design carbon nanotube thermal pads with a clever polymer-composite matrix. When you apply typical CPU mounting pressure, this matrix physically adapts. Moreover, as your CPU reaches core operating temperatures between 60°C and 80°C, the pad softens slightly. Consequently, it perfectly conforms to all the microscopic imperfections on both the CPU and the cooler base. This micro-conformability ensures excellent contact and heat dissipation.

Electrical Risks of Carbon Nanotube Thermal Pads

While these pads offer amazing thermal benefits, you must consider practical hardware safety. Specifically, you need to know if your specific pad formulation is electrically conductive. Because carbon naturally conducts electricity, some carbon nanotube thermal pads carry electrical conductivity risks. Therefore, you must exercise extreme caution when applying them near sensitive surface-mounted capacitors. This risk increases significantly if you use the pad directly on raw silicon dies, such as in direct-die cooling setups. To stay safe, always check the manufacturer’s specifications. If the pad conducts electricity, you must apply a protective coating or tape to nearby exposed components.

Final Thoughts on Solid-State TIMs

Ultimately, these advanced thermal pads represent a massive leap in PC cooling technology. By eliminating the messy paste, they save you time and keep your temperatures stable for years. Furthermore, they provide a clean, reliable, and highly efficient thermal interface for your most demanding builds. If you want to learn more about advanced PC cooling methods and material science, you can check out this comprehensive guide on Tom’s Hardware for further reading.

References

  • Noctua NT-CP1 Computex 2026 Press Release and Product Specifications.
  • Thermal Conductivity Metrics for Solid-State TIMs (Hardware Engineering Journals).
  • Tom’s Hardware: PC Cooling and Thermal Interface Materials Guide.

 Nvidia RTX Spark Superchip: Deconstructing the 3nm Arm Architecture for Laptops

 A sleek laptop showing the futuristic Nvidia RTX Spark Superchip running advanced AI tasks.

Recently, Nvidia and MediaTek announced the Nvidia RTX Spark Superchip. This powerful processor changes how Windows laptops work. For years, laptop makers used older x86 designs. Now, they are moving to advanced Arm-based architectures. Therefore, AI developers, heavy content creators, and portable workstation buyers need to understand this monumental shift.

The new chip provides incredible speed and massive efficiency for complex tasks. Before now, developers needed a massive desktop computer to run large AI models. Today, you can perform these heavy tasks right on your laptop. Next, we will break down the hardware that makes this magic happen.

The 3nm Hardware Manifest of the Nvidia RTX Spark Superchip

Nvidia and MediaTek designed the Nvidia RTX Spark Superchip to dominate the market. They build it entirely on TSMC’s cutting-edge 3nm node. This tiny size means the chip packs more power into less space. As a result, the laptop stays very thin and light.

Let us look at the layout. The chip features a powerful 20-core Grace CPU. Alongside this CPU, Nvidia includes a Blackwell-architecture GPU. This GPU boasts 6,144 CUDA cores. Consequently, the chip handles basic computing and heavy graphics at the same time. For instance, if you edit a 12K video, the CPU organizes the files while the GPU renders the high-quality images smoothly.

Unified Coherent Memory Throughput

The Nvidia RTX Spark Superchip also features an amazing memory system. Traditional computers use separate memory pools for the CPU and the GPU. In the past, this separation created annoying bottlenecks. Data moved slowly between the two parts.

However, this new chip packs up to 128GB of unified, coherent memory directly on the package. Because of this design, both the CPU and the GPU access the same data pools simultaneously. They do not wait for data to travel across slow PCIe lanes. For example, when you load a massive 90GB 3D scene, the laptop processes it instantly. It blows past traditional memory limits and keeps your workflow moving fast.

The Local Petaflop Metric Explained

You might hear experts say the Nvidia RTX Spark Superchip delivers 1 petaflop of local compute. This metric sounds confusing, but it simply means the chip performs one quadrillion calculations per second. In the past, only massive cloud servers reached this speed.

Now, this math translates into incredible local AI workflows. Developers can run massively complex, 120-billion-parameter local AI models fully offline. You do not need an internet connection to use advanced AI agents. You run them right on your laptop keyboard deck. Furthermore, this local execution keeps your private data secure because it never leaves your machine.

Thermal and TDP Profile of the Nvidia RTX Spark Superchip

Heavy performance usually generates massive heat, but this chip changes the game. We must contrast this unified Arm superchip’s total power envelope against traditional high-end x86 gaming laptops. Older gaming laptops require a split 45W CPU and a power-hungry 140W discrete GPU. They generate excessive heat and drain batteries in an hour.

In contrast, the Nvidia RTX Spark Superchip delivers comparable creative performance while using a fraction of the power. MediaTek’s intelligent power management keeps the chip cool. Consequently, you get a slim laptop with all-day battery life. Finally, you can explore more about this hardware shift online. For further reading on this groundbreaking technology, visit the Nvidia Newsroom.

References

  • Nvidia. (2026). NVIDIA and Microsoft Reinvent Windows PCs for the Age of Personal AI. Nvidia Newsroom.
  • MediaTek. (2026). RTX Spark | Next Era of Windows PCs. MediaTek Products.
  • PCMag. (2026). Nvidia Unveils RTX Spark, an Arm-Based Superchip for Windows PCs. PCMag Technology News.