The technology world is currently buzzing with excitement over a massive shift in mobile devices. For many years, companies focused mostly on making software smarter. However, the 2026 Robot Phone changes this trend by introducing physical movement to your handheld device. This shift represents “Embodied AI,” where the phone can actually interact with the physical world around it. Instead of just sitting flat on a table, this new hardware moves, rotates, and responds to your presence.
Leading this revolution is the Honor Robot Phone. This device does not just stay still; it uses advanced motors to follow your movements. Because of this, the phone feels more like a helpful companion than a simple piece of glass and metal. Many tech experts at recent summits believe this is the most significant hardware change since the invention of the touchscreen.
The Power of the Motorized Gimbal
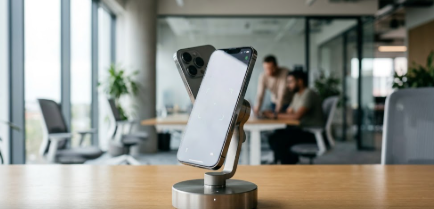
The most impressive feature of the 2026 Robot Phone is its motorized titanium alloy gimbal. This base acts like a neck for the phone, allowing it to nod, shake, or rotate in any direction. Specifically, the titanium alloy provides incredible strength while keeping the device light enough to carry in your pocket. This hardware allows the phone to track you automatically during a video call. If you walk across the room while talking, the phone simply turns its “head” to keep you in the center of the frame.
Furthermore, this motorized base turns your device into a smart home security hub. You can place the phone on a counter, and it will rotate to scan the entire room for movement. Consequently, you no longer need multiple static cameras to watch your home. This mechanical evolution makes the phone much more functional in your daily life.
Interacting with AI Gestures
In addition to physical movement, the 2026 Robot Phone introduces a new way to communicate through “AI Gestures.” Most phones require you to touch the screen or speak to a virtual assistant. However, this phone can understand your physical body language. For example, if the phone asks you a question, you can simply nod your head “yes” or shake it “no.” The phone’s sensors detect your movement and respond accordingly.
Moreover, the phone itself can “gesture” back to you. It might tilt forward to show it is listening or wiggle to grab your attention when you receive an important notification. These interactions create a more human-like experience. By moving beyond simple voice commands, the device feels more intuitive and easier to use for people of all ages.
Better Photography with Subject Tracking
The 2026 Robot Phone also solves the common problem of shaky or poorly framed photos. It features a massive 200MP sensor that works perfectly with the motorized base. Because the camera can move independently of your hand, it can physically track subjects in real-time. If you are filming a pet running in a park, the phone will automatically pivot to follow the action. This technology effectively ends the era of “shaky cam” videos.
In addition, the proactive photography system ensures that every person stays in the shot during group photos. You can set the phone down, and it will adjust its own angle to make sure everyone fits perfectly. This means you no longer need a tripod or a dedicated photographer to get the best high-quality shots.
Advanced Silicon-Carbon Battery Technology
Moving physical parts requires a lot of energy, which is why the 2026 Robot Phone uses a special battery. Engineers equipped these models with a 6,000 mAh silicon-carbon battery. This specific technology provides a much higher power density than standard lithium-ion batteries. Consequently, the phone can move its motors all day without running out of juice.
Even though the battery has a large capacity, it does not make the phone bulky. The silicon-carbon material allows the battery to stay thin, maintaining the phone’s slim and elegant profile. As a result, you get a powerful, moving robot that still fits comfortably in your hand or pocket.
Conclusion
The shift toward embodied AI hardware marks a turning point for the smartphone industry. With its motorized gimbal, gesture recognition, and powerful battery, the 2026 Robot Phone offers more than just a screen. It offers a dynamic partner that helps you capture better memories and communicate more naturally. To learn more about the future of AI devices, you can read more about Embodied AI trends on TechCrunch.
References
- Honor Official Tech Summits 2026
- TechNewsWorld: The Rise of Embodied AI Hardware
- Journal of Mobile Engineering: Advancements in Silicon-Carbon Battery Density
- Global Specs Finder: 2026 Mobile Hardware Comparisons