Summary of Key Points
- Cloning transfers your entire operating system, applications, and files to a fast NVMe SSD without reinstalling Windows.
- You need an external USB to M.2 NVMe enclosure, a compatible SSD, and reliable cloning software.
- The process involves connecting the drive, initializing it, cloning the partitions, and installing the physical drive.
- Configuring the BIOS ensures your laptop boots directly from the high-speed NVMe drive.
Introduction
Upgrading your laptop with a solid-state drive is the best way to improve boot speed and overall performance. In this comprehensive guide, you will learn how to clone laptop hard drive to NVMe SSD step by step without losing personal data or software settings. Consequently, you can enjoy lightning-fast load times in under an hour.
Tools Required Before You Begin
Before starting the cloning process, you must gather a few essential tools. First, purchase an M.2 NVMe SSD that matches your laptop specifications. Next, obtain an M.2 NVMe to USB enclosure so you can connect the new drive externally. Additionally, download reliable cloning software such as Macrium Reflect or Hasleo Disk Clone.
Step 1: Connect the New NVMe SSD to Your Laptop
First, insert your new NVMe SSD carefully into the external USB enclosure. Then, plug the enclosure into a fast USB port on your laptop using the provided cable. As a result, your operating system should recognize the new storage device. However, if the drive does not appear in File Explorer, you simply need to initialize it first.
Step 2: Initialize the NVMe SSD in Windows
Next, right-click the Windows Start button and select Disk Management. A pop-up prompt will ask you to initialize the new disk. Choose GPT (GUID Partition Table) because modern NVMe drives work best with UEFI boot systems. After selecting GPT, click OK to prepare the target drive for cloning.
Step 3: How to Clone Laptop Hard Drive to NVMe SSD Step by Step
Now, open your preferred cloning application. Select your existing hard drive as the source drive and choose the external NVMe SSD as the target drive. Furthermore, ensure you select all essential system partitions, including the boot sector and recovery drive. Click Next, verify the partition alignment settings, and start the cloning procedure. Depending on your data size, this process takes roughly 15 to 45 minutes.
Step 4: Swap the Mechanical Hard Drive with the NVMe SSD
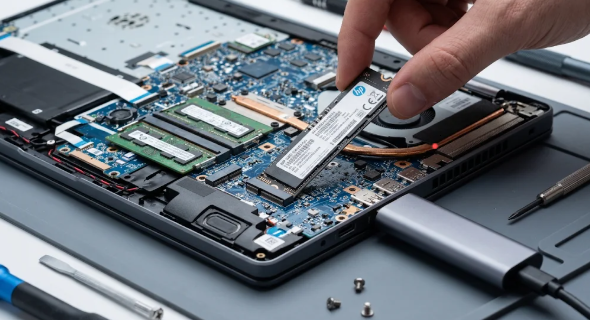
Once the software completes the cloning process, shut down your laptop entirely. Unplug the charging cable and disconnect all external devices. Carefully remove the screws from the bottom panel of your laptop. Afterwards, disconnect the internal battery for safety, remove the old hard drive, and insert the new NVMe SSD directly into the M.2 slot on the motherboard. Secure the drive with its mounting screw and reattach the back cover.
Step 5: Boot Your Laptop from the New NVMe Drive
Finally, turn on your laptop. Modern laptops usually detect the primary boot drive automatically and launch Windows without manual changes. However, if your computer fails to boot, press F2 or Del repeatedly during startup to enter the BIOS menu. Adjust the boot order list so that your new NVMe SSD takes top priority. Save your changes and exit.
Conclusion
By following these instructions, you successfully upgraded your system storage without reinstalling Windows or configuring your apps again. Furthermore, your laptop will now boot in seconds and execute demanding applications smoothly. For more detailed technical assistance regarding partition management and hard drive tools, check out the official Microsoft Support Disk Management Guide.
References
1. Microsoft Support: Overview of Disk Management in Windows.
2. Crucial Storage Technology: How to Install an M.2 NVMe PCIe SSD Guide.
3. Western Digital Support: System Migration and Storage Upgrade Overview.